New Horizons Dawn
I suppose that I'd bought the first items of hardware that would allow me to finally escape the trials and tribulations of attempting to fly a simulated airplane by way of mouse and keyboard about three years ago now. I do know for sure that I first began flying a sim just after my fascinating 'rocky' flight to Porto in December of 2017, but could not have even thought of such a purchase until after my eerily smooth flight to Krakow the following December.
These were, of course, the pairing that anyone wanting to 'get real' would initially choose to purchase. The ubiquitous Logitech yoke and throttle quadrant package. Price brand-new was around £120.
At first these were quite a revelation to me. All at once I could really appreciate the very precise level of control over forces that a wannabe pilot would have to learn, master and command in order to get a plane in the air, keep it there and then put it down again. It was tough work still, but fun however!
Even though there were no real forces to deal with other than those weak ones induced by the hardware items themselves, it was, and for a long while, enough. However, in the end I bored of flying the Flightgear Cessna 172 around the default airport and city of Prague, and the hardware went into the corner of my room for a few years and there gathered dust...
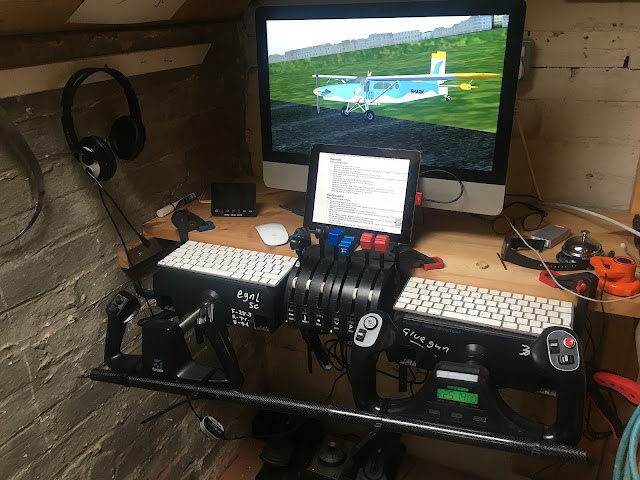
Early this year it occurred to me to set the sim up once more. As before, it was bolted together upon my desk, which was a pain in the arse to deal with because every time that I needed to open a drawer I had to unbolt the hardware!
Looking around for a solution, I saw that the bandsaw occupying the nook behind the staircase balustrade of my attic shop could be moved out and the sim moved in. The space that was at my disposal there was a neat forty-inch square which would give me the opportunity build a flight deck just about the right width for most general aviation plane instrument panels and with enough depth for the rudder pedals — which I did not have!
And so once again I invested in, yes, you've guessed it...
Logitech.
 |
1st iteration.
Some old planks knocking about my shop were cut to length and a supporting shelf created between the wall and the balustrade. The computer was placed on top and the Logitech wheel fastened with g-clamps below. Then I bought a second wheel and quadrant [lacking a clamp] by successfully offering £50 for a 'buy-it-now' Ebay £70 price tag. This was the Saitek, Cessna-badged original. (I intend to draw comparisons between these two apparently same products at some time soon because they are important ones).
Here's where accurate homework and numerical thought came into play.
Though both control wheels are 12 inches wide, the casings are 11 inches in width... which is odd because every of the real Cessna control wheels that I have researched do seem to be 11 inches in width. The wheel shafts were spaced apart by 22 inches from one another, each 11 inches from dead centre, which put both pilot and co-pilot positions realistically close to both the wall and balustrade on either side but with just enough knuckle clearance there for comfort.
Eleven inches seemed to be a recurring number here...
 |
| Dropping the quadrant and tablet. |
2nd iteration.
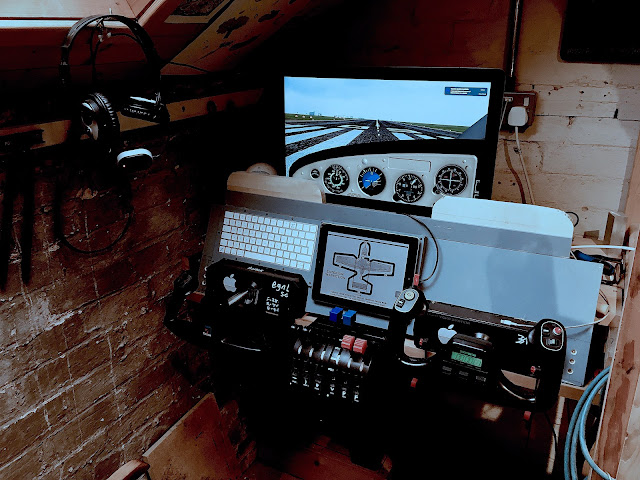
A further shelf I now added below the first to support the control wheel casings without using g-clamps and then dropped the quadrants downward by 5 inches on top of that shelf also.
The trouble now was that because the wheels were both one inch oversize I found that I did not have much knuckle clearance from the quadrant's outer levers which meant that I could easily shut down engines by inadvertently hitting the mixture levers or fluff take-off and landing by hitting the throttles!
Never mind!
The answer at some time in the near future would be to drop the quadrants further still (and realistically much further).
 |
| The plank in place. The sixty degree angle was quite comfortable for typing. Not tall enough so experimenting here with added off-cuts and a strip of pine. |
An old Ipad had been pressed into service for reading checklists, plane manuals and the like. My two wireless Mac keyboards were placed on top of the wheel casings and I was happy with those arrangements for a week or three.
I'd played around with these elements endlessly trying to establish some kind of logical order. Then when finally satisfied, had decided to add a wooden panel behind to support them. This was cut and roughly shaped (but tightly) around the control casings and then screwed in place to a second lower shelf at an angle of 60 degrees to the horizontal. One keyboard was fastened to it with a makeshift housing of MDF.
But why 60 degrees exactly and neither more nor less?
Well, because this angle was found through long trial and error to be quite comfortable enough for typing where vertical was found to be nigh impossible and less than sixty — not quite right for some reason of aesthetics...
Experiment, experiment and experiment once again!


Comments
Post a Comment