Having committed fully to the revised main panel and all its shock-panels, I set to work making a final arrangement of them.
Firstly the MDF main panel was faced with black hardboard. Hardboard takes paint very well on its smooth side and glues up very well on its rough reverse side. It's also soft and easy to work, even with craft knives, but is still firm enough to survive the rigours of experimentation if handled carefully.
For the purposes of just establishing things at very low cost, it can't be beaten. Later, I can make replacements in aluminium for realisms sake, but for this panel and its various shock-panels, the total expenditure on aluminium will be quite high.
The new shock-panel was sprayed black. I thought that I might experiment with an entirely black panel instead of a blue-grey one. The Cessna 02 had a black panel and for good reason. It was a warbird and warbirds always seem to have black panels, don't they?
They always looks grubby and chipped to me. Matt black paint over bright aluminium is bound to be a nightmare to keep neat and tidy...
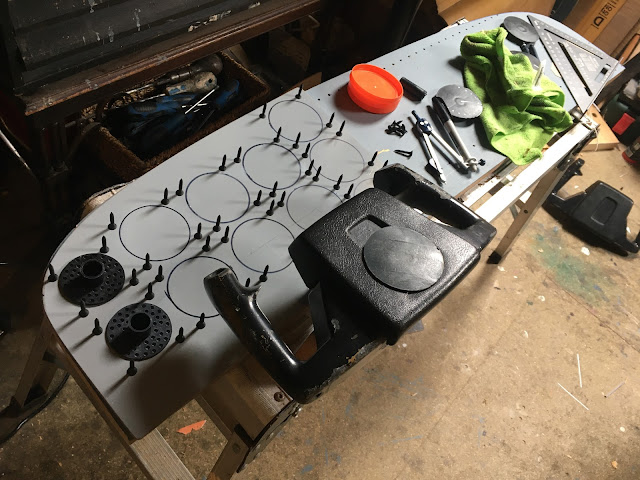
The next step was to carefully draw the now 'accurate' layout on the major shock-panel with a white chalk pen (a damp rag eraser was essential!) Then find find dead centre of each instrument — centre punch each and cut them out with a holesaw.
This is part of the reason that I bought myself the Bosch PBD 40 bench drill. I had needed such a tool anyhow but had procrastinated for years, When this project commenced I saved a little money and placed my order because I knew how much work it would make light of.
I have to say that the PBD 40 made easy work of this task.
The only problem was one of reach, which is just over 5 inches. Though all the holes were quite easy here, I still had to throw the panel about a lot to make them all. However, if I'd had to drill at the dead centre of the panel then it probably could not have been done. A hand drill would be the only answer in such a case.
Once done, the major shock-panel was studded with seven bolts around its perimeter. These are in the right places according to my photo research (not to be entirely trusted) and will become the shock-mounts.
The minor shock-panel was placed on top and things were looking well.
All these black panel components were then temporarily arranged, one atop the other, but without nailing anything down.
I ummed and ahhed over this all-black colour scheme for quite a while, but ultimately it was decided not to be...
The hardboard facing for the main panel on the co-pilot side was clean, and so I sprayed it blue-grey and glued it in place.
The facing for the pilot side — was a tad scabby!
But it was my last large piece ~
It was sprayed black, sanded lightly, sprayed once more, and sanded again. and this process continued until the surface was almost acceptable.
Unfortunately, with hardboard, once the smooth and tough facing is compromised by damp, as this piece had been, it peels away and you just cannot repair it well because you'll find yourself trying to beat the very soft and granular body beneath, which just does not want to become smooth.
It would not matter much because this part of the panel would not be seen once all the instruments were in place.
It too was glued in place.
The major shock-panel was then sprayed blue-grey. The combination of a black background beneath a light coloured panel was both pleasing to the eye, and proved optically useful, because the stark contrast it afforded made things seem simple and clear.
The minor shock-panel was placed on top, some quickly made instrument dials were drawn with a silver ink pen on black paper, cut out with the OLFA circle cutter, and popped in place with end of my index finger ...
And then the whole arrangement looked pleasing to the eye.


Comments
Post a Comment